Showing posts with label chocolate. Show all posts

Friday, April 22, 2016

S'mores Brownies

These little brownie bites are very similar to this recipe, but I've updated things a bit with a homemade brownie recipe (my favorite one to date) and used actual marshmallows instead of making a frosting. These are easier, but equally delicious. They are best when served right after roasting (broiling) the marshmallow, but are still pretty tasty for 2-3 days. If you're eating them a while after the inital broiling, you might want to zap it in the microwave for 5 seconds or so to reheat the marshmallow.

I like to make these in mini muffin tins, but you could also make them in a 9 x 13 baking pan.


S'MORES BROWNIES
makes about 36 mini brownie bites 

Graham Cracker Crust 

  • 6 tablespoons (3 ounces) butter, melted and cooled 
  • 1 1/2 cups graham cracker crumbs
  • 2 tablespoons sugar
  • 1/4 teaspoon salt

Brownies
  • 3/4 cup flour
  • 1/2 teaspoon salt
  • 10 ounces semi-sweet chocolate, chopped
  • 1/2 cup butter
  • 1 cup sugar
  • 1 teaspoon vanilla
  • 3 eggs
  • 36 marshmallows 


CRUST

Preheat the oven to 325 degrees and line mini muffin tins with cupcake liners. 


In a medium bowl combine graham cracker crumbs, sugar, and salt. 


Pour in butter and mix until well combined. 


Place a tablespoon or so of crumb mixture in the bottom of each cup and use a tart tamper to flatten out.  


Bake for 15-20 minutes. 


BROWNIES

Change oven temperature to 350 degrees.  


In a medium-sized bowl, combine flour and salt. Set aside. 


Melt butter and chocolate in a saucepan on low-medium heat. Stir until smooth.  


Set chocolate aside to cool for 8-10 minutes.  


Whisk sugar and vanilla into chocolate.  


Add one egg at a time to chocolate mixture, mixing well after each addition.  


Fold in flour mixture until just combined. 


Pour batter into prepared muffins tins, even dividing batter among 36 cups.


Bake for 20 minutes or until an inserted toothpick comes out mostly clean with some moist crumbs attached.  


Turn the oven to broil.


Place one marshmallow on top of each brownie and place under the broiler for about 1 minute. Watch closely so you don't burn the marshmallows! Unless, of course, you like them that way.


NOTE: You can make the crust and brownies ahead of time and then broil the marshmallows right before serving so they are warm and gooey and de-lish.


Sources: The Kitchn (crust), The Blonde Buckeye (brownies)

Thursday, January 21, 2016

Mint Brownies

Mint brownies are nostalgic for me. My mom used to include them on her Christmas cookie platters growing up. And since I love brownies and frosting, they were a favorite of mine. My freshman year of college, she sent me a box of them for my birthday and I blew through them embarrassingly fast. And, a few years back, one of my favorite co-workers brought these to school for treat day Wednesday and it reminded me of how much I love them.

So, it only feels right that I document such a classic recipe. This homemade brownie recipe is my fave thus far in life and I purposely wanted a good brownie to frosting ratio. This looks about right to me.

Tip for Cutting: In order to get a good, clean cut, I refrigerate the brownies and then use a knife that I have run under hot water. Clean the knife after each cut.


MINT BROWNIES

Brownies
  • 3/4 cup flour
  • 1/2 teaspoon salt
  • 10 ounces semi-sweet chocolate, chopped
  • 1/2 cup butter
  • 1 cup sugar
  • 1 teaspoon vanilla
  • 3 eggs 

Mint Frosting
  • 3/4 cup (6 ounces) butter, room temperature 
  • pinch salt
  • 4 cups powdered sugar
  • 2 teaspoons mint extract
  • 4-6 tablespoons milk or cream
  • 4 drops green food coloring (optional) 
Chocolate Layer
  • 1/2 cup (4 ounces) butter
  • 1 cup (7 ounces) semi-sweet chocolate

BROWNIES

Preheat oven to 350 degrees. 


Prepare a 9 x 13 inch pan with parchment paper. Leave a few inches hanging over the side so the brownies can easily be lifted out after baking. Spray parchment with cooking spray. 


In a medium-sized bowl, combine flour and salt. Set aside. 


Melt butter and chocolate in a saucepan on low-medium heat. Stir until smooth.  


Set chocolate aside to cool for 8-10 minutes.  


Whisk sugar and vanilla into chocolate.  


Add one egg at a time to chocolate mixture, mixing well after each addition.  


Fold in flour mixture until just combined. 


Pour batter into prepared baking dish and spread evenly.  


Bake for 25-30 minutes or until an inserted toothpick comes out mostly clean with some moist crumbs attached.  


Allow brownies to cool completely (1-2 hours) before frosting.  


MINT FROSTING

In a stand mixer with the paddle attachment, beat the butter and sugar together until combined.  


Add powdered sugar, one cup at a time, mixing well after each addition to make sure there are no lumps and scraping the sides of the bowl as needed.  


Add peppermint extract. 


Add milk or cream, amount will depend on desired consistency.  


Add food coloring, if using.  


Spread evenly on top of cooled brownies. Place in refrigerator while next layer is prepared.  


CHOCOLATE LAYER

Heat chocolate and butter on low heat in a small saucepan. Stir until melted and smooth.  


Pour over mint frosting and use an inverted spatula to gently spread evenly.  


Chill in refrigerator for several hours, until chocolate is set.  


Cut while cool, but serve at room temperature.  


Sources: The Blond Buckeye and Thayne Orgill 

Friday, November 6, 2015

Cookie 'n Cream Brownies

These are my dream brownies come true. The fluffy white frosting is the perfect compliment to the fudgey brownies. And topping just about anything with mini Oreos seems like a very, very good idea.

I've tweaked this recipe a bit so that you make your own marshmallow cream, instead of having to buy the store-bought stuff, since that can be hard for me to find (and expensive!).


COOKIES 'N CREAM BROWNIES 

BROWNIES
  • 1 cup (8 ounces) unsalted butter
  • 8 ounces semisweet chocolate 
  • 4 large eggs
  • 2 cups sugar
  • 1/4 teaspoon salt
  • 1 1/2 teaspoons vanilla
  • 1/4 cup + 1 tablespoon cake flour
  • 1/4 cup + 2 tablespoons unsweetened cocoa powder

FLUFFY WHITE FROSTING
  • 1 egg white
  • 1/2 cup corn syrup 
  • 1/8 teaspoon salt
  • 8 tablespoons vegetable shortening
  • 1/4 cup unsalted butter, softened
  • 1 tablespoon vanilla
  • 2 cups powdered sugar 

CHOCOLATE TOPPING
  • 2 tablespoons unsalted butter
  • 2 tablespoons corn syrup
  • 1/2 cup semisweet chocolate
  • 2 teaspoons very hot water
  • mini Oreo cookies 

Preheat oven to 350 and line a 9 x 13 pan with parchment paper. Spray parchment with cooking spray.   


Melt butter over low heat. Add chocolate and stir until chocolate is melted and smooth. Turn off the burner, but leave the pan on it to keep it warm.  


In a large bowl, whisk the eggs, sugar, and salt until incorporated. 


Gradually whisk the chocolate mixture into the egg mixture. Add the vanilla.


Place the flour and cocoa in a sifter or wire mesh strainer. Sift directly into the batter and stir with a spatula until just combined.  


Pour batter into the prepared pan and spread until even .  


Bake for 30-35 minutes until a toothpick inserted into the center comes out clean.  


Cool for several hours or overnight.  


To make the frosting, start by making a marshmallow cream.  Beat the egg white, corn syrup, and salt in a stand mixer fitted with the wire whisk attachment. Beat on high for 8-10 minutes or until stiff peaks form.  


Remove the marshmallow cream to another bowl. Change the attachment to the paddle.  


Beat shortening and butter until well combined. Add the marshmallow cream back to the bowl. 


Add the vanilla. 


Slowly mix in the powdered sugar a half-cup at a time. Beating well after each addition.  


Spread frosting evenly over brownies and top with mini Oreos.  


Make the chocolate topping by melting the butter and corn syrup in a small saucepan. 


Turn off the heat and add the chocolate. Stir in hot water to thin the mixture. 


Drizzle over the top of the brownies.  


Chill for at least one hour.


Cut into bars while chilled, but serve at room temperature.   


Source: Modified from Crazy for Crust

Wednesday, January 28, 2015

Peanut Butter Brownies

Oh, how I love chocolate and peanut butter together.  This recipe reminds me a lot of the chocolate peanut butter bars posted here, but I like them even a little more because the base is a brownie and doesn't require a boxed mix.


PEANUT BUTTER BROWNIES

Brownies:
  • 3/4 cup flour
  • 1/2 teaspoon salt
  • 10 ounces semi-sweet chocolate
  • 1/2 cup unsalted butter
  • 1 cup sugar
  • 1 teaspoon vanilla
  • 3 eggs 
Peanut Butter Frosting:
  • 1/2 cup unsalted butter, softened
  • 1 cup creamy peanut butter
  • 2 1/2 cups powdered sugar
  • 1 teaspoon vanilla extract
  • 1-2 tablespoons milk or whipping cream 
  • pinch of salt 
Glaze:
  • 1 cup semi-sweet chocolate, chopped
  • 1/4 cup creamy peanut butter 


BROWNIES:

Preheat over to 350 degrees.  


Prepare a 9 x 13 inch pan with parchment paper.  Leave a few inches hanging over the side so the brownies can easily be lifted out after baking.  Spray parchment with non-stick spray.  


In a medium-sized bowl, combine flour and salt.  Set aside.  


Melt butter and chocolate in a saucepan on low-medium heat.  Stir until smooth.  


Set chocolate aside to cool for 8-10 minutes.   


Whisk sugar and vanilla into chocolate.  


Add one egg at a time to chocolate mixture, mixing well after each addition.  


Fold in flour mixture until just combined.  


Pour batter into prepared baking dish and spread evenly.  


Bake for 25-30 minutes or until an inserted toothpick comes out mostly clean with some moist crumbs attached.  


Allow brownies to cool completely (1-2 hours) before frosting.  


PEANUT BUTTER FROSTING:


Beat butter and peanut butter with the paddle attachment on a stand mixer (or with a hand mixer).  


Add powdered sugar, 1/2 cup at a time.  Beat well after each addition.  


Add vanilla, 1 tablespoon of milk (or cream), and salt.  


Beat on medium speed for another 1-2 minutes.  


Add more milk or cream if it is too thick.  


Spread frosting evenly over cooled brownies.    


GLAZE:

Melt chocolate and peanut butter together in a saucepan on medium-low heat.  Stir continuously until smooth.  


Allow mixture to cool for several minutes.  


Pour glaze over frosting and smooth evenly.  


Chill brownies in the fridge for several hours before cutting.  


Monday, December 1, 2014

Chocolate Silk Pie

This recipe is a repost.  I shared it a long while back, but made it for the millionth time this past weekend for Thanksgiving and thought it deserved another shout out.  I made it in actual pie form this time although it can also be made in individual servings like I did here.  This is always a hit and oh so easy, especially if you have a stand mixer.  


CHOCOLATE SILK PIE
  • 1 cup butter, softened
  • 1 1/2 cups sugar
  • 3/4 cups cocoa
  • 4 tablespoons vegetable oil
  • 2 teaspoons vanilla
  • 4 eggs
  • pie crust (see recipe below for graham cracker crust)

Combine butter, sugar, cocoa, and oil in a mixer and beat for a significant amount of time.  


NOTE:  I usually turn on the mixer and walk away.  The sugar will not be dissolved even after a significant amount of time.  Don't be alarmed.  


Add vanilla and eggs, one at a time.  Beat well after each egg and scrape the bowl several times.  Mixture will get lighter and fluffier as you continue to beat.  


Put mixture in pie crust and chill for as long as possible, a few hours at minimum. 


Note on Crust:  You can use a traditional pie crust or a graham cracker crust.  I personally prefer a graham cracker crust (see recipe below).  


Serve with whipped cream and top with chocolate shavings if so desired.


Source:  Marsha Porter


GRAHAM CRACKER CRUST
  • 1 1/2 cups graham cracker crumbs (10 crackers)
  • 1/4 cup sugar
  • 6 tablespoons (3/4 stick) butter, melted

Preheat oven to 350 degrees.  


Combine graham crackers, sugar, and butter in a bowl


Press mixture into a 9-inch pie pan making sure the sides and bottom are an even thickness.


Note:  I like to use my hands and a tart tamper to get the graham cracker crumbs evenly spread and pressed. 


Bake for 10 minutes.  Allow to cool completely.  


Source: Ina Garten

Monday, March 24, 2014

Chocolate Mint Parfaits

I made these for a little St. Patty's Day get together last weekend and am happy to report that they taste very much like a shamrock shake from McDonald's. Apparently, shamrock shakes aren't really a thing here, even though there are a ton of McDonald's.  Boo.  This makes me sad.  They are so tasty and remind me of being a kid.  

These little parfaits are very similar to this peppermint pie, except for I made the marshmallow fluff from scratch (not hard at all), put them in individual glasses (or you can use plastic cups), and added a little green food coloring.  I think I like this version even better.  Oreo crust, chocolate silk pie, mint fluff, and a dollop of whipped cream?  Yes, please.  


CHOCOLATE MINT PARFAITS

Oreo Cookie Crust
  • 20 Oreos, crushed
  • 3 tablespoons butter, melted

Combine crushed Oreos and melted butter and mix well.  


Add a teaspoon or two of Oreo mixture into the bottom of each cup or glass and use a tart tamper to flatten it out.  

--------------------------------------------------

Chocolate Silk Pie 
  • 1 cup butter
  • 1 1/2 cups sugar
  • 3/4 cups cocoa
  • 4 tablespoons vegetable oil
  • 2 teaspoons vanilla
  • 4 eggs

Combine butter, sugar, cocoa, and oil in a mixer with the whisk attachment and beat for a significant amount of time.  


NOTE:  The sugar will not be dissolved yet.  Don't be alarmed. 


Add vanilla and eggs, one at a time.  Beat well after each egg and scrape the bowl several times.


Mixture will get lighter and fluffier as you continue to beat.


Transfer mixture to a piping bag and top crust with a small amount of chocolate pie mixture.


Place in refrigerator to chill while making the next layer.

--------------------------------------------------

Mint Fluff 
  • 2 egg whites
  • 1 cup light corn syrup
  • 1/4 teaspoon salt
  • 1 1/4 cups powdered sugar
  • 1 1/2 teaspoons vanilla
  • 1/4 cup milk
  • 1/2 teaspoon peppermint extract OR 1/8 teaspoon peppermint oil
  • 2 cups whipping cream, whipped

Combine egg whites, corn syrup, and salt in a stand mixer with the whisk attachment.  


Beat on high speed for 10 minutes or until thick.  


Add powdered sugar and beat on low speed until blended.  


Add vanilla and blend.  


Transfer marshmallow mixture to a large mixing bowl.  


Add milk to marshmallow and combine using a whisk.


Note: It takes a while to incorporate the milk into the blob of marshmallow cream.  Stick with it, it'll eventually come around.


Add peppermint oil and green food coloring (if using).


Fold in whipped cream. 


Carefully spoon mint mixture on top of chocolate pie and place in the freezer for at least a couple of hours.


Before serving, top with a dollop of whipped cream.  


Source:  Megan Porter

Friday, October 18, 2013

Cherry Cheesecake & Brownie Parfaits

What is it about canned cherry pie filling?!  I genuinely love the stuff.  I could eat it by the spoonful out of the can.  I think this is another one of those things that goes back to my childhood.  My mom wasn't a make-things-from-a-can kind of mom, which was awesome, but also resulted in making things like canned cherry pie filling weirdly special and delicious.  Mmm.  It's so perfectly thick and gooey.    

For this recipe, I was prepared to make homemade cherry pie filling (I even bought the cherries), assuming I might not be able to find the canned version, but lo and behold . . . And, I couldn't resist.   

So, there are two ways you can go with this lovely little dessert: semi-homemade or all the way homemade.  I've made both versions and both are scrumptious.

There are three parts to these parfaits: cherry pie filling, brownies, and cheesecake filling. 

You can easily throw these together by using a box brownie mix, Philadelphia cheesecake filling (comes in a tub all ready to go), and canned cherry pie filling.   

OR, if you're feeling up to the task, you can use the recipes below for homemade brownies and cheesecake filling.  I'm finding that I'm making more and more things from scratch because I'm never quite sure what I'll be able to find in the stores here.  Plus, I'm no health expert, but I'm pretty sure there are health benefits to eating less preservatives and chemicals that are found in boxed and ready-made foods.  Although, when we're talking brownies and cheesecake I often wonder if it matters?  ANYWAY, like I said, I still used canned pie filling on these, but I was looking at using this recipe in case I couldn't find it.  

I took these to a potluck the other night and they were a hit.  I used my favorite little IKEA juice glasses which made them a nice size.  Any bigger might be overdoing it.  Or not.  

CHERRY CHEESECAKE & BROWNIE PARFAITS

CHEESECAKE FILLING
  • 8 ounces cream cheese, softened
  • 1 1/4 cups powdered sugar
  • 1 teaspoon vanilla
  • 2 cups heavy whipping cream

Line a 8x8 baking dish with foil or parchment paper and set aside.  


In a stand mixer, using the whisk attachment, whip the cream cheese, powdered sugar, and vanilla together until smooth.  


Pour in the whipping cream and start mixing on low speed (to avoid major whipped cream splatter).  

Increase the speed and whip the mixture until it is thick and fluffy, 5-7 minutes. 


Spread mixture in baking pan, cover, and refrigerate for at least 4 hours or up to overnight.  


Before assembling parfaits, remove cream cheese fill from pan and place on a cutting board. 


Place filling in the freezer for 20 minutes. 


Cut filling into small cubes in preparation for assembling parfaits.  


HOMEMADE BROWNIES
  • 10 tablespoons butter (5 ounces)
  • 1 1/4 cup sugar
  • 3/4 cup plus 2 tablespoons unsweetened cocoa powder
  • 1/2 teaspoon salt
  • 1/2 teaspoon vanilla extract
  • 2 large eggs

Preheat the oven to 325 degrees.  


Line the bottom and sides of an 8x8 baking pan with parchment or foil and lightly grease with cooking spray.  


Combine butter, sugar, cocoa, and salt in a double boiler or a bowl set over a small amount of boiling water. 


Stir until butter is melted and mixture is combined.  


Set the mixture aside until it cools slightly.  It will look gritty, but will become smooth once the other ingredients are added.  


Stir in the vanilla.  


Add the eggs one at a time stirring vigorously after each one.  


When the batter looks thick, shiny, and well-blended, add the flour and stir until you cannot see it any longer.  Stir until well blended. 


Spread evenly in lined pan.  


Bake until a toothpick inserted into the center emerges slightly moist with batter, 20 to 25 minutes.


Let cool completely on a rack.


Cut into small cubes in preparation for assembling parfaits.  


ASSEMBLING PARFAITS

Alternate layers of brownies, cheesecake filling, and cherry pie filling in parfait glasses or other small juice glasses.  Refrigerate until ready to serve.  

Friday, July 12, 2013

Really Good Chocolate Cake

I made this cake for my brother's 40th birthday.  He requested chocolate cake with fluffy white frosting.  I like the way it turned out, both looks-wise and in the taste department.  In fact, the next morning I was really wishing I had taken at least a slice home.  Cake for breakfast?  Yes, please.   

I've made this chocolate cake a few times and each time it's been moist and delicious.  I think the sour cream helps.  Check the cake carefully as it bakes to make sure you do not overcook it.  There really is nothing worse than dry cake.  Blech.  Not even worth eating, in my opinion.  I would rather error on the side of being a little underdone.  If you're checking it with a toothpick, it's okay to have moist crumbs (even really moist crumbs) on it. 

I really like this recipe.  It's simple and from scratch. 


REALLY GOOD CHOCOLATE CAKE
  • 2 cups flour
  • 2 1/2 cups sugar
  • 3/4 cup unsweetened cocoa powder
  • 2 teaspoons baking soda
  • 1 teaspoon salt
  • 1 cup vegetable oil
  • 1 cup sour cream
  • 1 1/2 cups water
  • 2 tablespoons distilled white vinegar
  • 1 teaspoon vanilla extract
  • 2 eggs

Preheat the oven to 350 degrees.


Grease two 9-inch round cake pans with butter and line the bottom of each pan with a round of parchment paper.  Lightly grease the paper.


In the bowl of a stand mixer with the paddle attachment, sift the flour, sugar, cocoa powder, baking soda, and salt. Mix on low to combine well.


Add oil and sour cream and mix on low to combine.


With the mixer on low, GRADUALLY add the water. 


Add vinegar and vanilla.


Add eggs and mix until well blended.


Scrape down the sides and bottom of the bowl and be sure the batter is well-mixed and no flour bits remain.


Divide among the 2 prepared cake pans.  Using a kitchen scale really helps to ensure the layers are equal.


Bake for 40 to 45 minutes on the same rack, without the cake pans touching each other, or until a cake tester or wooden toothpick inserted in the center comes out almost clean.


Let cool in the pans for about 20 minutes.


Invert onto wire racks, carefully peel off the paper liners, and let cool completely.


Source:  Sugar and Spice by Celeste

Thursday, May 9, 2013

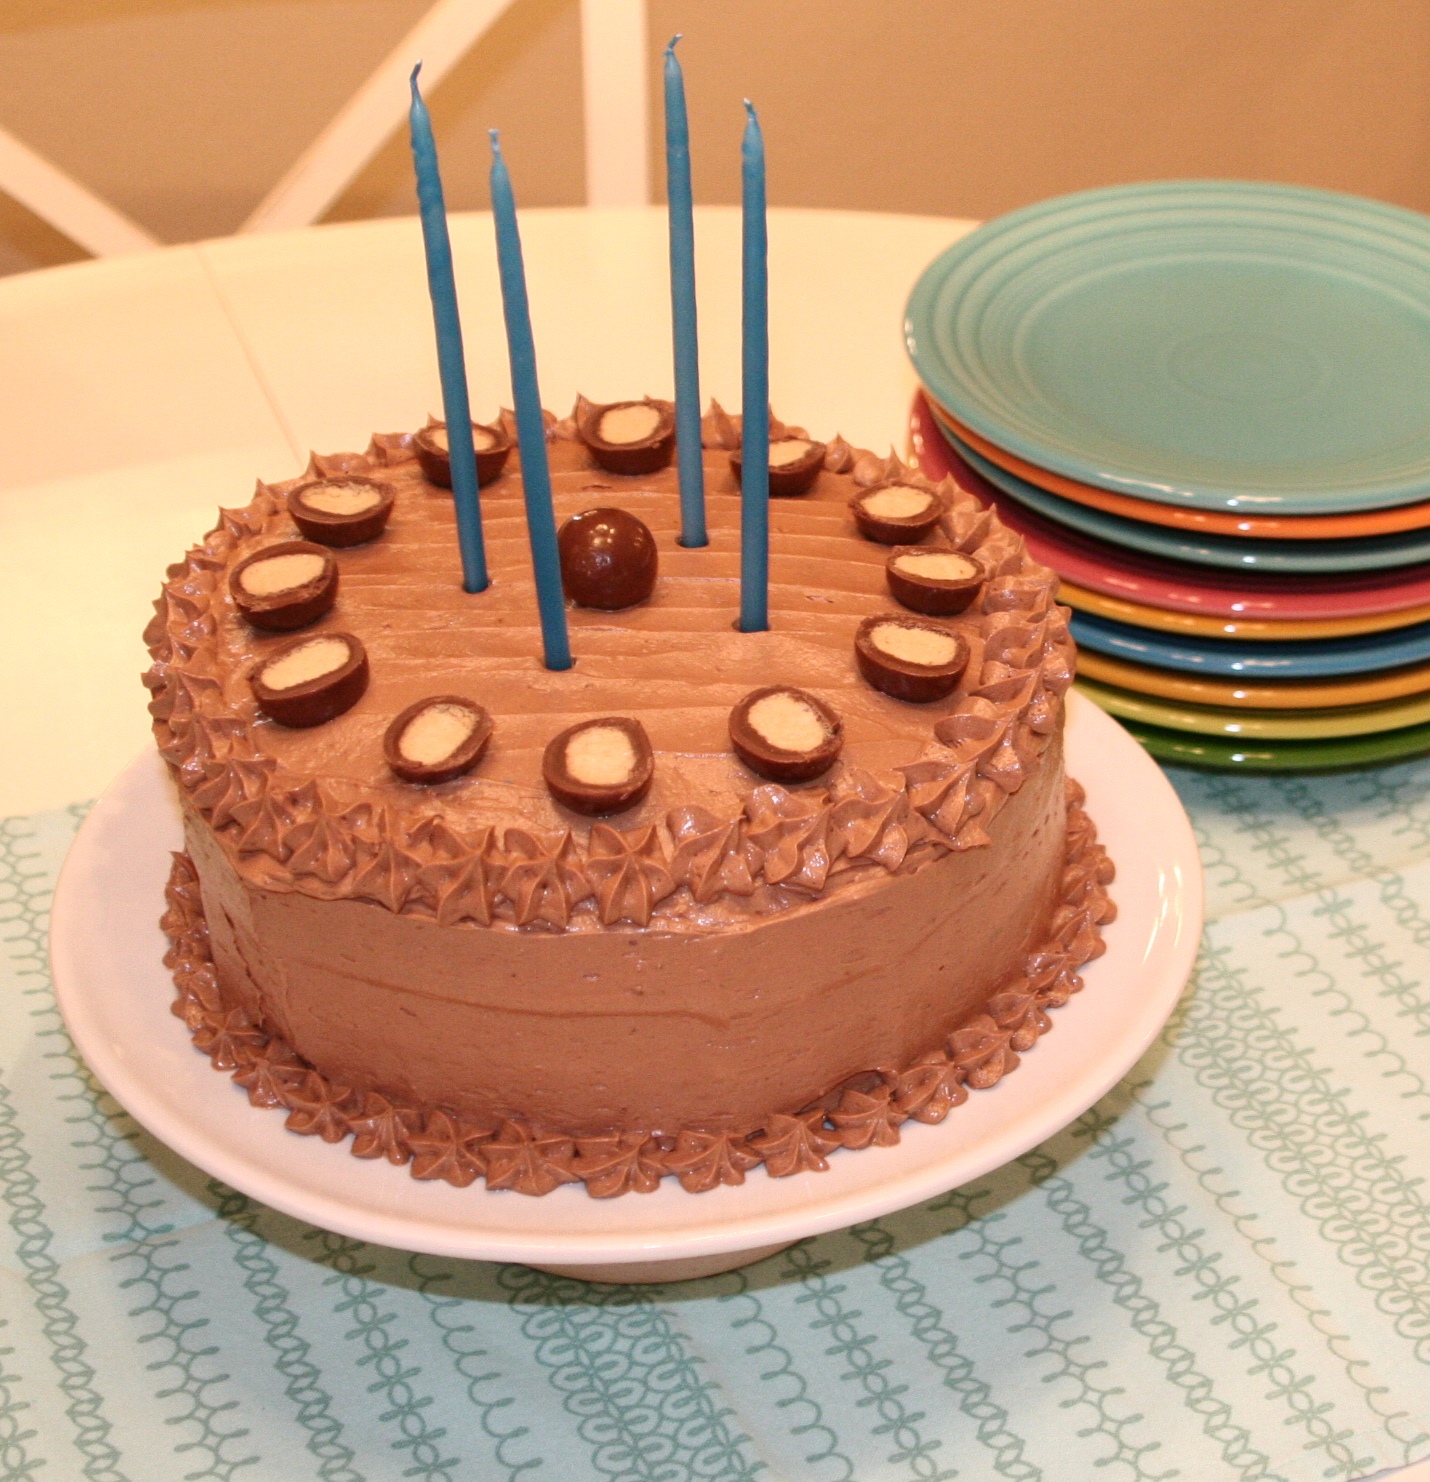
Marshmallow & Malt Chocolate Cake

A few weeks back I made my first layer cake for my friend's birthday.  It made me feel a little more like a grown up.  It wasn't the most amazing decorating job and my sides were far from perfectly smooth, but all in all, I thought the outcome wasn't too shabby.  It was a fun project.  And, it was REALLY tasty!

Although I really liked this cake overall, I didn't love the recipe that I used for the chocolate cake.  I'll have to keep searching for the perfect chocolate cake recipe.  In the meantimem however, I feel the need to share the frosting and filling for this cake because they were so good.  The world, or at least the handful of friends that read this little blog, need to know about these very delicious recipes.   

This is a 9-inch, 4-layer Whopper meets s'more cake.  The frosting has Ovaltine in it which gives it the malted flavor.  The toasted marshmallow filling has whole toasted marshmallows plus marshmallow cream plus butter.  Oooooh, so good. 

Here are some other tips and thoughts I have on this cake:
  • You can buy jars of marshmallow fluff or make your own.  I included the recipe below if you're interested in making it.  It's easy.  I'm always trying to think of things that I can use it for because I really love marshmallow fluff.  You can also freeze the extras.    
  • I made the malted frosting last week and used it on brownies.  De-lish!  I'm sure it would be good on cupcakes or sugar cookies as well. 
  • Ovaltine can be found near the hot chocolate in the grocery store.  I used the regular flavor, not the chocolate malt flavor.  I'm sure both would be delicious.      


The thick layers of marshmallow cream was on purpose.  The super-skinny layers of cake was not.  Cutting cakes into equally thick layers is tricky.  I definitely need a little more practice.   
 
MARSHMALLOW & MALT CHOCOLATE CAKE
 
Homemade Marshmallow Cream:
  • 3 egg whites
  • 2 cups light corn syrup
  • ½ teaspoon salt
  • 2 ½ cups powdered sugar
  • 1 tablespoon vanilla
Combine egg whites, corn syrup, and salt. Beat on high speed for 10 minutes or until thick.
 
 
Add powdered sugar and beat on low speed until blended.
 
 
Add vanilla and blend.
 
 
Toasted Marshmallow Filling:
  • 16 large white marshmallows
  • 1 cup powdered sugar
  • 1 cup butter (2 sticks), at room temperature
  • 1/2 teaspoon pure vanilla extract
  • 1 jar marshmallow cream OR 1 1/2 cups homemade marshmallow cream
 
Place marshmallows on cookie sheet lined with parchment paper and sprayed with nonstick cooking spray. Place on lower rack of oven, and broil marshmallows until nice and brown on top, between 30-60 seconds.
 
 
Remove pan from oven and gently turn the marshmallows over, and broil until they are golden brown. (Be sure to keep an eye on them--they burn very quickly.)
 
 
In an electric mixer fitted with the paddle attachment, combine butter and powdered sugar on low until blended, about 1 minute.
 
 
Add vanilla and mix on med-high for about 3 minutes.
 
 
Add marshmallow cream and toasted marshmallows, and mix on lowest setting for about 1 minute.
 
 
Malted Chocolate Frosting:
  • 1 pound butter (4 sticks), at room temperature
  • 4 cups powdered sugar
  • 3/4 cup Ovaltine Classic
  • 1 tablespoon vanilla extract
  • pinch of salt
  • 8 ounces semisweet chocolate, chopped, melted and cooled
  • 1/2 cup whipping cream

In a bowl of stand mixer fitted with paddle attachment, combine the powdered sugar and butter and beat on low speed for about 1 minute.
 
 
Add malt powder, vanilla and salt, and beat on low until well combined.
 
 
Add the melted chocolate and beat on medium speed until smooth (about 2 minutes).
 
 
Add whipping cream and beat on med-high speed for another minute.
     
Assembling the Cake:
 
Cut your two layers in half using a serrated knife. 


On a cake plate, put a small dollop of frosting.
 

Place your first layer face-up on the board (or plate) and cover with an even layer of the marshmallow filling, leaving about 1/2" around the edge. Place another cake layer face-up and repeat with malted frosting.
 
Repeat until you come to your final layer, which you will place face-down. If you find the cake too soft and unstable, put in refrigerator for a few moments to firm it up, then resume.
 
 
Frost entire outside of cake with remaining malted frosting.
 
Sources:
homemade marshmallow cream:  A Bountiful Kitchen
marshmallow filling:  Sweetapolita
chocolate malt frosting:  Sweetapolita

Friday, March 29, 2013

Chocolate Peanut Butter Bars

These are my new favorite treat.  HOLY SMOKES. I love them so much I made them twice this week. 

Here are some thoughts and suggestions I have on these yummy little bars:
  • Only refrigerate the bars as long as needed to get the ganache to set up.  Too much refrigeration dries out the bottom layer. 
  • The original recipe called for chopped peanuts in the peanut butter layer.  I didn't use them because I didn't have any and was very happy with the result.  No peanuts necessary, in my opinion.  Keep it smooth and simple. 
  • Use something other than chocolate chips for the ganache layer.  I find that chocolate chips don't always melt smoothly.  If the ganache is not initially smooth, use a whisk to smooth things out. 
  • I'm thinking it might be a very good idea to top these with the mini peanut butter cups from Trader Joe's.   
  • You might also want to serve them with a scoop of vanilla ice cream. 


CHOCOLATE PEANUT BUTTER BARS

Bottom Layer:
  • 1 Devil's food cake mix
  • 1/3 cup butter, melted
  • 1 egg
Middle Layer:
  • 3/4 cup butter, softened
  • 3/4 cup creamy peanut butter
  • 2 teaspoons vanilla
  • 3 cups powdered sugar
  • 2-3 tablespoons whipping cream or milk
Top Ganache:
  • 1/ 2 cup whipping cream
  • 12 ounces milk chocolate

Preheat oven to 350 degrees.


Line a 9 x 13 baking pan with foil (or parchment), extending foil over the pan edges. Lightly grease foil. No need to grease the parchment, if that's what you're using.


In a mixer, combine cake mix, melted butter, and egg. Beat on low speed for 1 to 2 minutes or until mixture is combined.


Press mixture into bottom of the prepared pan.


Bake for 12 minutes. Cool completely in pan on a wire rack.


In mixer, combine softened butter, peanut butter, and vanilla. Beat on medium speed for 30 seconds.


Add powdered sugar one cup at a time and beat well after each addition, scraping the bowl as needed.


Beat in the 2 tablespoons whipping cream.  Continue beating until very smooth and fluffy. 


Spread mixture evenly over the cooled crust.


Place bars in the refrigerator while preparing the ganache.
                  
In a small saucepan, bring 1/2 cup whipping cream just to boiling over medium-high heat.
Remove from heat and add chocolate pieces. Do not stir. Let stand 5 minutes.


Stir until smooth.


Cool 15 minutes. Very gently pour ganache over bars, lightly spreading it to the edges.


Cover and chill for 1 to 2 hours or until set.


Using the edges of the foil, lift the uncut bars out of the pan and cut. 


Source:  Better Homes and Gardens

Sunday, December 23, 2012

Muddy Buddies

This is a good ol' classic.  I'd forgotten how delish it is until I made it for my kids at school a while back.  There's something very addictive about this little peanut buttery-chocolate-crunchy mixy mix. 


 MUDDY BUDDIES
  • 9 cups Chex cereal (I like to use rice Chex.)
  • 1 cup semisweet chocolate chips
  • 1/2 cup peanut butter
  • 1/4 cup butter
  • 1 teaspoon vanilla
  • 1 1/2 cup powdered sugar

Measure cereal into large bowl. (I use the biggest bowl I have. It makes mixing much easier.)


In bowl, microwave chocolate chips, peanut butter, and butter for 1 minute. Stir.


Microwave for 15-30 more seconds and stir until smooth.


Add vanilla to chocolate mixture.


Pour mixture over cereal and mix until well coated.


Add powdered sugar and mix well.


NOTE: You can put the mixture into a plastic bag and add the powdered sugar and shake. I feel like this can easily be done in the bowl instead.


Spread on wax paper and cool.


Source:  Chex Website

Thursday, December 20, 2012

Peppermint Pie

I had some leftover Trader Joe's Candy Cane Joe-Joes and wanted to make something festive.  This is what happened: Candy Cane Joe-Joe crust, thin layer of ganache, chocolate silk pie filling, peppermint fluff, topped with crushed candy canes!!  I combined a few things that I love to make up this little number that I will call peppermint pie.  I'm not really sure that it's a pie, but don't know what else to call it.  I made it in a springform pan and like the way it looked when finished.  You could definitely make it in a pie pan if you don't have a springform.  I'm going to make it again for Christmas Eve and can't wait to enjoy the fluffy goodness.   

This was really easy, but just a little time consuming because it needs time to freeze and set up.  The nice thing is you can make it ahead of time.


PEPPERMINT PIE

Before starting, line the sides of a spring form pan with foil.  This will make removing the pie in the end easier and less messy. 


CRUST
  • 2 cupsTrader Joe's Candy Cane Joe-Joe crumbs (about 20 cookies)
  • 3 tablespoons butter, melted

Combine cookie crumbs and melted butter.


Press into the bottom of a spring form pan. 


Bake at 350 degrees for 10 minutes. 


GANACHE
  • 1/2 cup cream
  • 3 ounces semisweet chocolate, chopped

Pour 1/2 cup cream in a small saucepan and heat over medium heat until simmering.


Pour the hot cream over the chopped chocolate and set aside (without stirring) for 3-5 minutes.


Whisk until combined and glossy smooth. Cool the ganache to room temperature by whisking quickly for a few minutes.


Spread the ganache over the bottom and place in the freezer while you make the next layer. 


CHOCOLATE SILK PIE
  • 1/2 cup butter
  • 3/4 cups sugar
  • 6 tablespoons cocoa
  • 2 tablespoons vegetable oil
  • 1 teaspoons vanilla
  • 2 large eggs

Combine butter, sugar, cocoa, and oil in a mixer and beat for a signficant amount of time.


NOTE: The sugar will not be dissolved yet. Don't be alarmed.


Add vanilla and eggs, one at a time. Beat well after each egg and scrape the bowl several times.


Mixture will get lighter and fluffier as you continue to beat.


Add mixture on top of the set ganache and smooth evenly. 


Place in freezer for several hours. 


PEPPERMINT FLUFF
  • 1 (13 ounce) bottle marshmallow cream
  • 1/4 cup milk
  • 1/2 teaspoon peppermint extract OR 1/8 teaspoon peppermint oil
  • 2 cups whipping cream, whipped
  • 1-2 candy canes, crushed

Mix together marshmallow cream and milk using a whisk.  (It takes a while to incorporate the milk into the blob of marshmallow cream.  Stick with it, it'll eventually come around.)


Add peppermint oil.


Fold in whipped cream.


Spread mixture on top of frozen chocolate silk pie.


Sprinkle crushed candy canes on top.


Return to the freezer and freeze for several more hours. 


Let sit out for a few minutes before cutting and serving.


Remove spring form pan and foil from sides. 


Cut into generous slices. 


Source:  Megan Porter

Friday, October 19, 2012

Chocolate Silk Pie

My mom made this pie growing up.  It was always my Grandpa's favorite.  I recall having it for many breakfasts the day after Thanksgiving.  I rediscovered this treasure a few years back when I was wanting a chocolate pie recipe to serve at book club.  We had read The Help and I thought I was hilarious for serving chocolate pie. 

You can make this in a regular pie crust or in a graham cracker crust, my personal favorite.  It's also fun to make in individual serving glasses.  I did that this last time in little Ikea juice glasses.  Makes for a nice and easy presentation.  Also helps with portion control.   


CHOCOLATE SILK PIE
  • 1 cup butter
  • 1 1/2 cups sugar
  • 3/4 cups cocoa
  • 4 tablespoons vegetable oil
  • 2 teaspoons vanilla
  • 4 eggs

Combine butter, sugar, cocoa, and oil in a mixer and beat for a significant amount of time. 


NOTE:  The sugar will not be dissolved yet.  Don't be alarmed. 


Add vanilla and eggs, one at a time.  Beat well after each egg and scrape the bowl several times.


Mixture will get lighter and fluffier as you continue to beat. 


Put mixture in pie crust and chill.


Serve with whipped cream.


NOTE:  If you're going the route of making individual servings, use this graham cracker crust recipe.  Put a small amount of the graham cracker mixture in the bottom of each glass and use a tart tamper to flatten it out.  No need to bake.  Yields: 10 individual servings   


Source:  Marsha Porter